I have destroyed quite a few of my paintings. My excuse is that I don't have the space to keep them all sitting around, but really, it's because I find them dreadful to look at. Burning is the most cathartic and satisfying method, but I have also chopped them up for holiday gift tags or used the backs for test scraps and cooperative toddler art experiments.
It's difficult to measure progress if all my old work vanishes, however, so I keep a few around just to see how things are going. Every once in a while, when I need a good bit of artistic exercise, I'll re-paint one to see what happens. And now--brave or foolish--I'll share one with you.
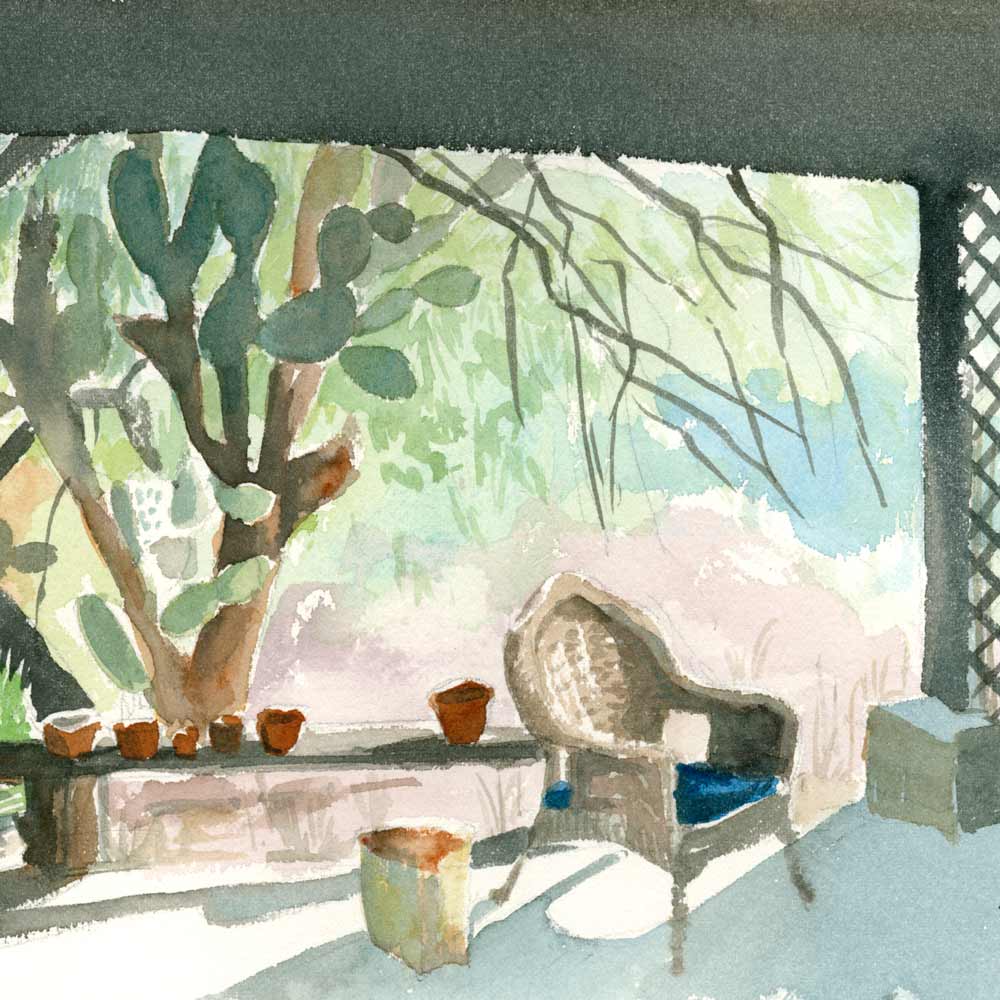
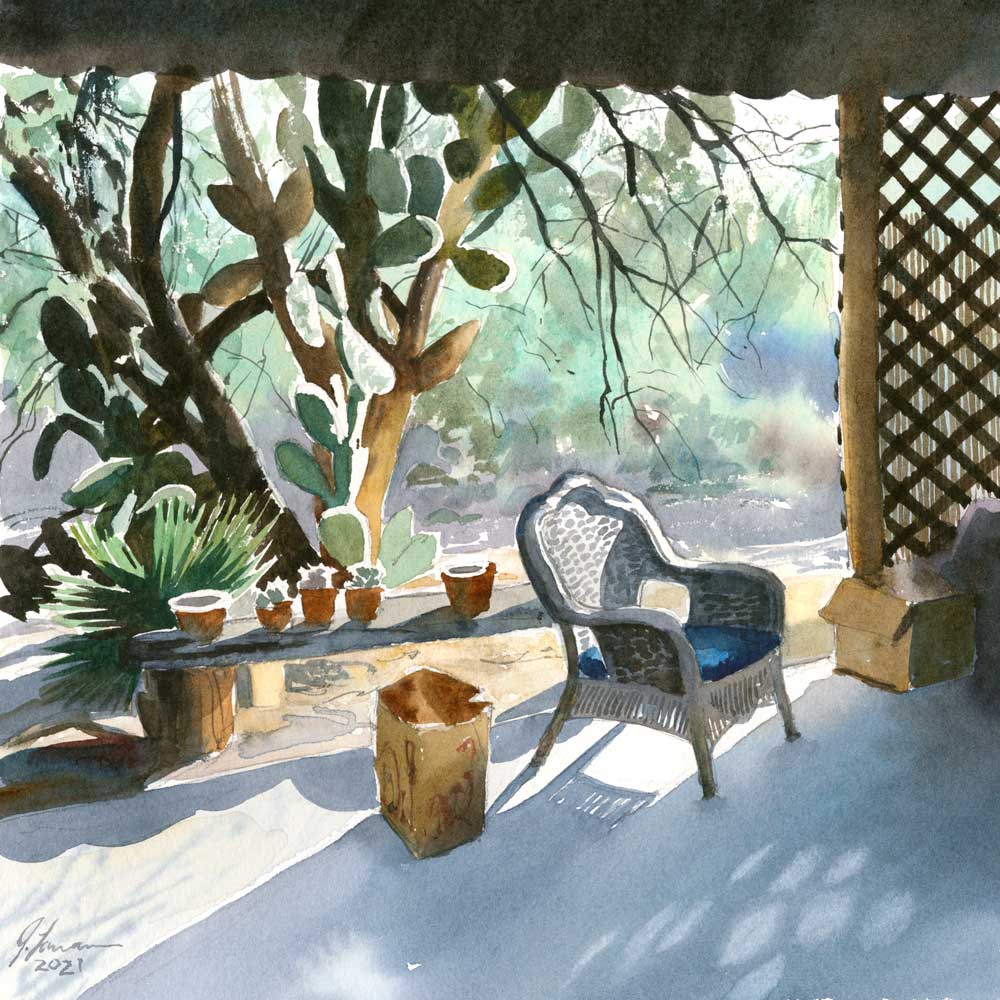
This scene is from a photograph taken ages ago in Tucson, AZ. I first painted it in 2012. What has almost a decade has done for my watercolors? How did my past self handle the challenges in this scene? What did I do differently today?
As you can see, some things have changed. Do these two look like they were made by the same person? (Am I the same person I was 9 years ago? Do I have any of the same cells as I did then? What is the self, when we are all fundamentally made up of clouds of swirling atoms and empty space? Am I getting too far off topic?) Here are the main differences I notice:
Value (also called "tone" across the pond) refers to the darkness or lightness of a color; in other words, how close to black or white it would look if shown without color. I identified this early on as one of my watercolor weaknesses. I was confused and distracted by color, and value was hard to control because watercolor dries significantly lighter than when you apply it. But the problem needed to be addressed. Without a solid arrangement of values it is impossible to make a strong composition.
In the old painting on the left, the shadow on the ground is not dark enough to connect it to the ceiling and trellis, so it doesn't feel like it's a real shadow. The cactus is anemic, lacking both highlights and contrast with the background. The new painting has a wider range from light to dark, and the shadowed areas are more similar in value and form a cohesive shape. This gives the painting compositional focus and conveys a more convincing sense of the afternoon sunlight.
There's also evidence that I've improved at separating hue and value. When seen in black and white, the pole on the right is similar in value in both versions of the painting. But when seen in full color, the hue of the pole in the 2012 version is the same blue-gray all the way down while in the 2021 version it warms to brown as it gets closer to the ground. Thanks to years of practice, I can now change the hue of a color while keeping the value the same.
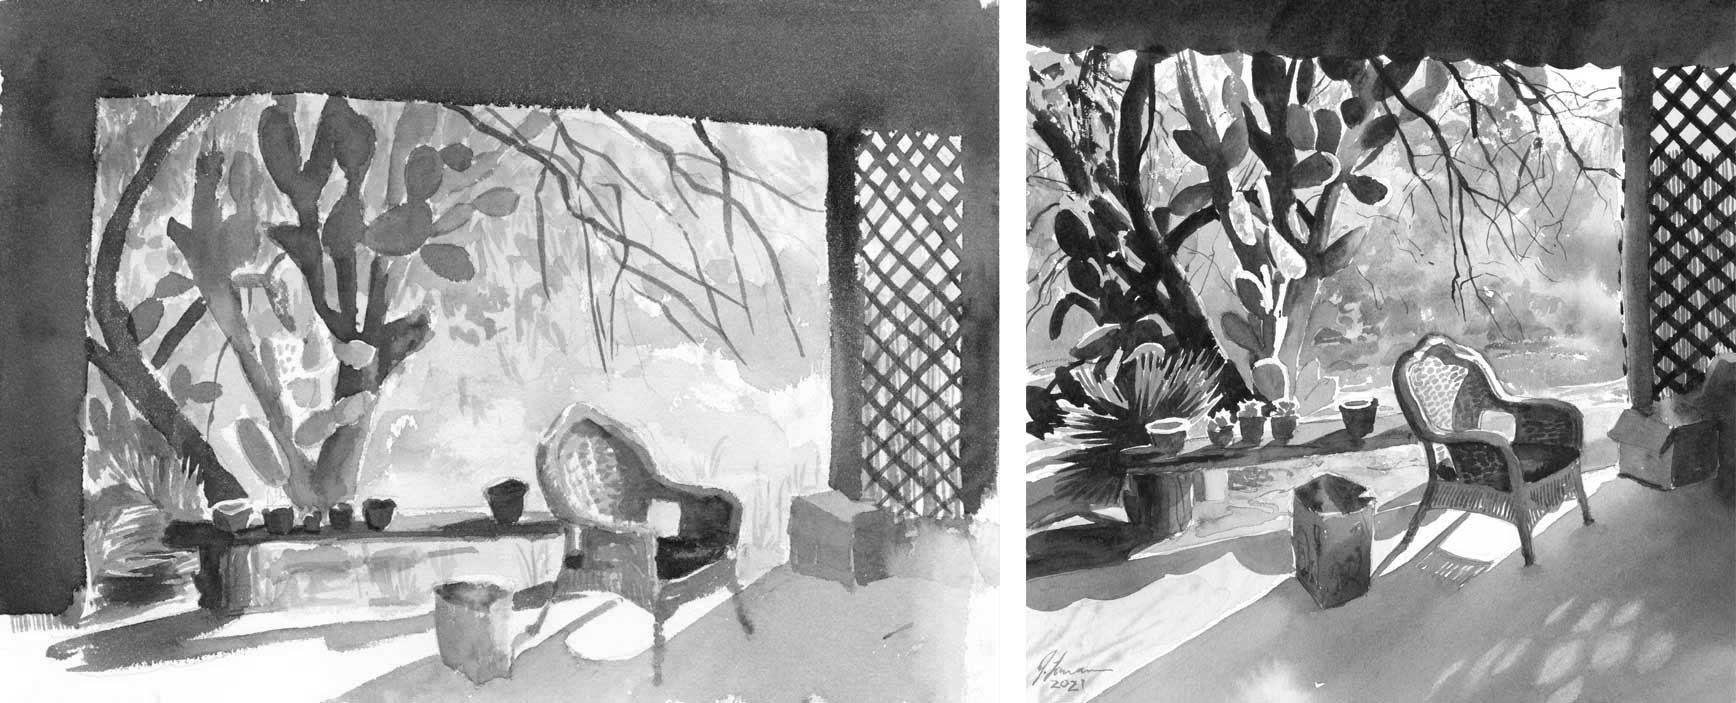
In addition to my value woes I struggled with planning. The random composition of the 2012 version is a prime example. Something should have been the focus of this image, but with the haphazard layout I cannot figure out what it was supposed to be. Instead of choosing a paper size that would work with the image I wanted to achieve, I forced the picture to fit onto the paper that I had on hand. The dark wall and ceiling is overwhelming and the perspective is dominated by dull horizontals without much sense of depth. I addressed these problems in the new version by choosing the chair as the subject and positioning it using the rule of thirds. I changed the perspective slightly to make stronger diagonals and eliminated the least interesting parts of the scene.
The new painting wouldn't have been possible for me in 2012 because I hadn't yet learned the necessary watercolor techniques. It was made with simple glazes: a wash of pink, a wash of blue, some green, one layered after another in dry succession. Glazing can look great when done well, but that's not how I'd describe my 2012 picture. The new painting has a more elaborate strategy: I've employed a variety of techniques for specific and intentional effects. Here are a few:
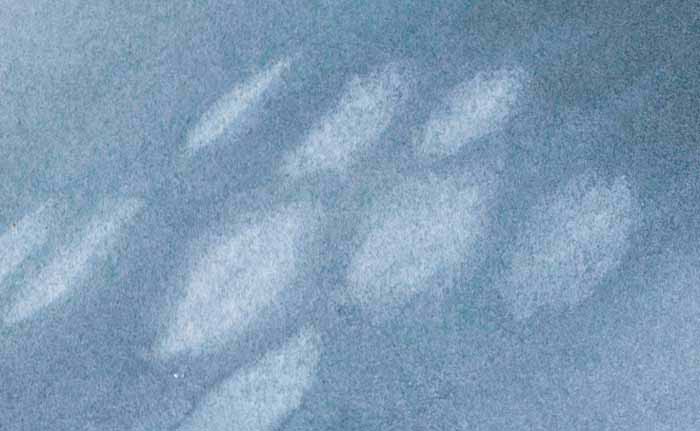
I used a technique called "lifting" for the soft light pattern on the ground. While the shadow wash was still wet, I used a dry brush to absorb and lift away paint. It's important to do this quickly enough to avoid hard or dark edges, but not so quickly that the surrounding wash will fill it in again. I chose this soft look because I wanted a contrast between the crisp shadows of nearby objects like the chair and the blurry shadows of distant ones like the trellis. If I had masked out these shapes it would feel very different.
Note: Some pigments will stain the paper and resist lifting, while others will lift very readily. In my experience paint lifts more easily from smoother paper like hot press.
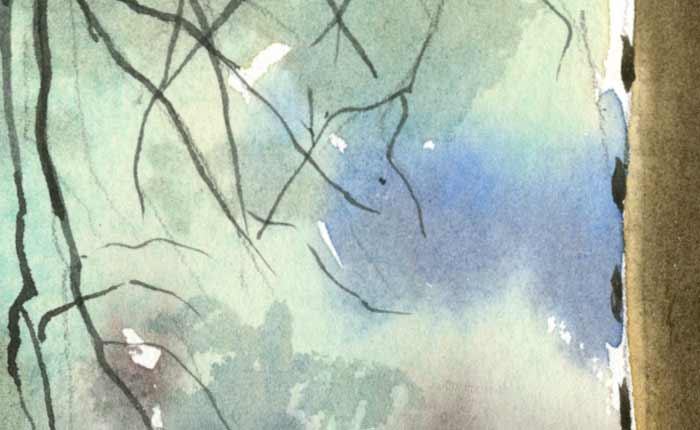
Wet washes make lovely gradations and textures when they combine. This is where learning to nail your value on the first wash can really help: if you can get the color and value right in one pass the watercolor textures will shine, and you'll avoid destroying them with subsequent glazes. Wet washes also avoid hard edges; helpful for allowing backgrounds and non-essential areas to visually recede or for atmospheric effects like clouds or smoke. You can combine wet-in-wet with glazes and dry brush to make complicated textures that are great for foliage.
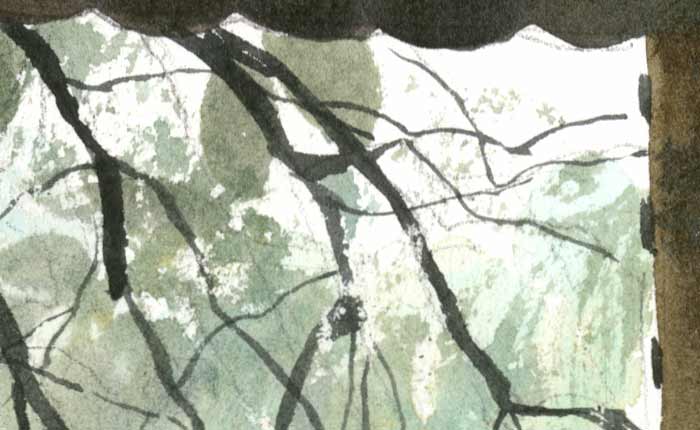
I transitioned from the wet wash to dry brush toward the top of the trees to create the impression of delicate leaves. I painted this texture with the side of my round brush rather than the tip. I also scribbled a bit in this area with a white candle before painting to create some additional texture.
You can control how much a brush stroke will spread or blur into an existing wet wash by controlling the amount of water in your brush. I made these blurred shadows with a rigger brush dipped in blue-gray paint that had the consistency of maple syrup. It wasn't exactly "dry," but different from the wet-in-wet technique mentioned above. A thicker paint mixture like molasses would have made a more defined line. As a rule, keep your wash on the paper nice and wet and then work drier washes into it. (Not the other way around.)
I love watercolor because every painting is unique: with variations in paper, pigment, brushstrokes, and even local weather and humidity, it's impossible to make the same painting twice. Is this new painting perfect? Hardly--in fact I can already spot a few things I'd change, and I'll probably be cringing come tomorrow. But on the whole, I think it's a more interesting image. These techniques might be better explained in a video (a project for another day!) but nonetheless I hope that this encourages you to keep on painting and making your art, and to avoid the trap of worrying about who is a so-called "good" or "bad" painter or what "talent" even means. No matter where you feel like you are on your artistic journey, your work will incrementally improve, change, and challenge you in new ways, and I hope you find that as interesting as I do.